
Changelog
Release date scheduled on end of every month.
Update 2025-06-30

Change App Icon
Customize your app icon. Go to Settings > General Settings. Scroll to the bottom.
2 image files needed, with specific resolutions and type.
After changing the icon images, the app that is already installed, may need to be uninstalled and installed again.

Example of a new customized app icon in desktop PC.

Customers can also instal the same shortcut icon in their phones, thru the online bills.

The same icon will appear on the customer login page.
Another new feature; Customer can now regenerate his own password in case they forgot, if he previously provided an email address.

New Authorization: Limit Login by devices.
To limit users to login only on registered devices, go to Users > Permissions > Users > Allow Login From Any Device.
Change the authorization limit accordingly.
To register a device, open the system from the device, and go to Settings > Company Information > Register.

Minimum Bill Due for Online Payment Gateway
To set a minimum amount of payment for online payment gateways, go to Accounting > Account.
Search for the appropriate payment account. Click the blue pencil icon, and click the yellow right arrow.
Click Show Advance Settings.
On Select From Template, choose the correct template. The system will populate the inputs with the correct values.
There will also be another input: Minimum Due (RM). Put the desired minimum due amount there.
Save Changes.
Note:
Passwords are now case-sensitive.
Update 2025-06-17

Check Out as a D.O.
For orders from businesses or clients who pay once after some number of deliveries, we can now check out the New Order as a D.O.
This wont be calculated as Sales yet.
On the Item Selection page, click the small arrow next to the Check Out button. Choose D.O.

The D.O. comes with no charge. Just a list of items with or without pricing.

The D.O. can later either be:
- Re-Edit, and checked out as a normal order and invoice, or
- Consolidated into a generated invoice via the Invoicing function at All Orders
In All Orders page, the Invoicing button now comes with a filter to see the uninvoiced D.O.s.

Item And Category Filter In Customer List
In Customer List, click on the 3 dots button at the end of the filter sentence to open filter on items and categories.
This can be used to filter the customer list for a more targeted promotional whatsapp messaging.

Limit Voucher Claim for a Profile
There is now an option to limit how many time a customer can claim a particular voucher code.
E-Invoice Integration
How to integrate MyInvois portal to your Works25 system.
Step 1: Setting Up MyInvois Portal
Open your browser, and go to:
mytax.hasil.gov.my
Login into MyTax.
Please register if you have not used MyTax before. Click e-Daftar to register.
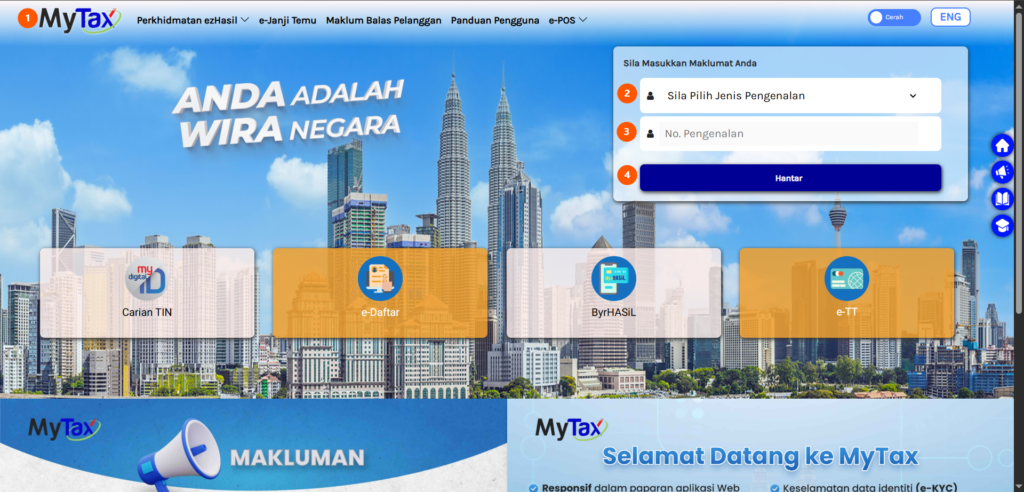
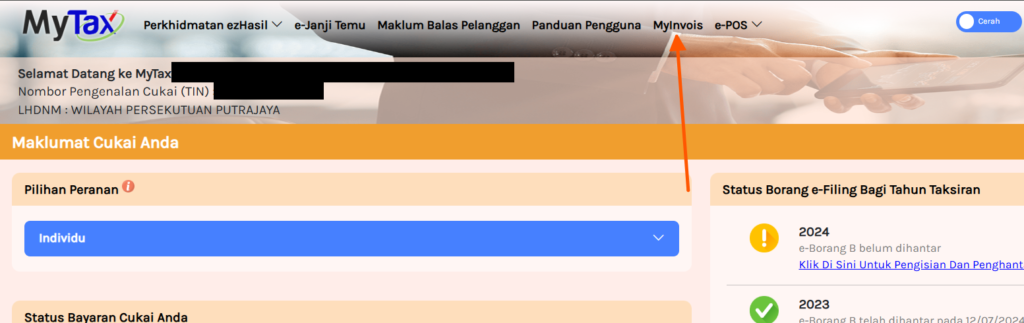
Click MyInvois on the top navigation bar.
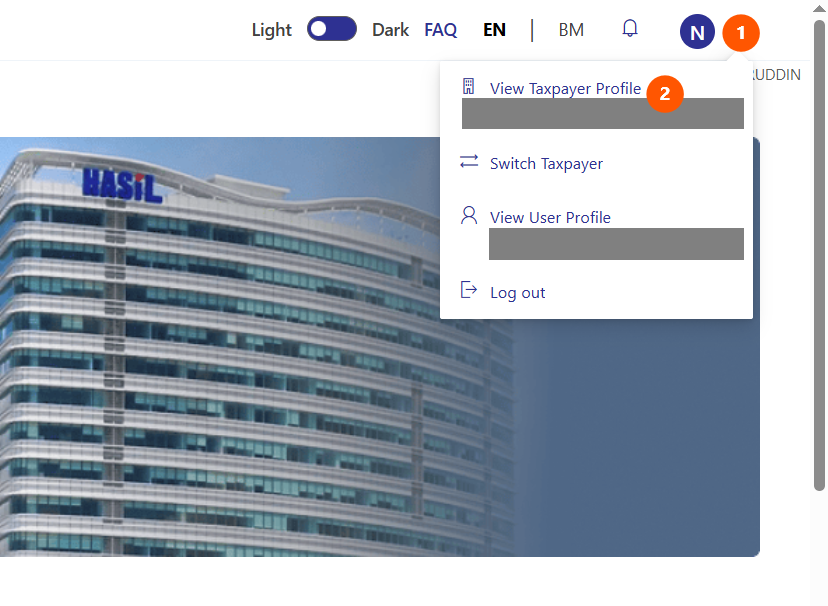
On the top right corner of the page, click on your name.
Then, click View Taxpayer Profile.
If you wish to change taxpayer, click Switch Taxpayer.
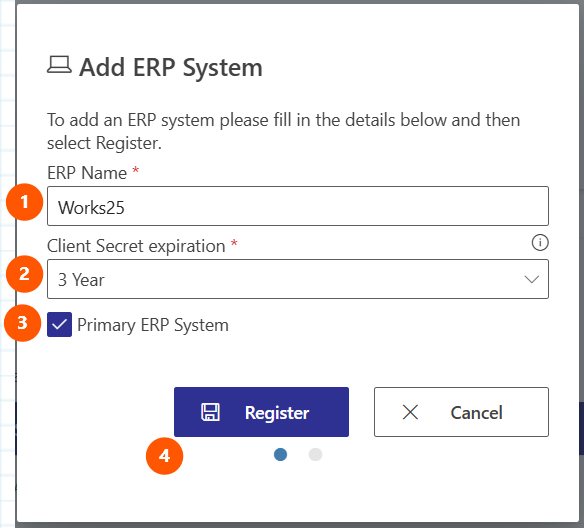
Click Register ERP
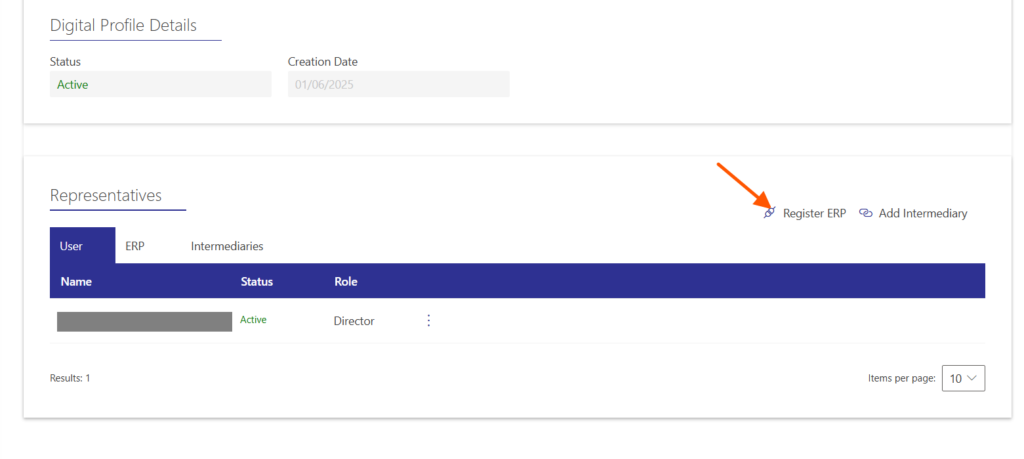
- Type in Works25 as the ERP Name
- Choose 3 years as the Client Secret Expiration
- Tick Primary ERP System
- Click Register
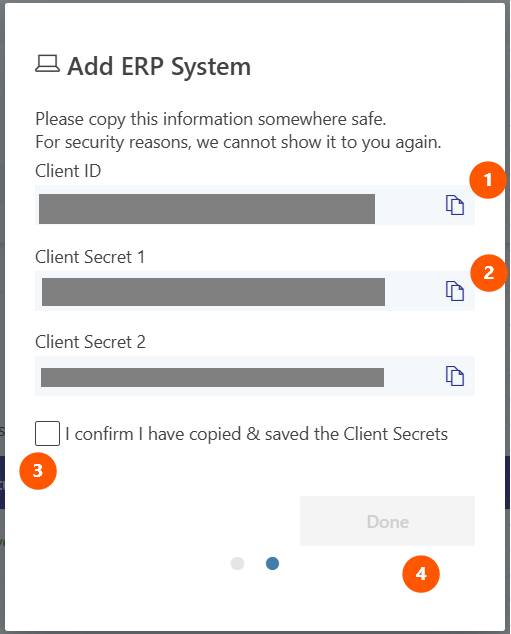
This is the important part.
Copy the Client ID, and Client Secret 1, and save them onto a note file.
Open a note file, or anywhere you can store this information.
We will use these credentials later in Works25 system.
- Click the copy icon to copy the Client ID. Paste it onto the note file.
- Click the copy icon to copy the Client Secret 1. Paste it onto the note file.
- Tick I confirm…
- Click Done.
Step 2: Setting Up the Integration in Works25 System
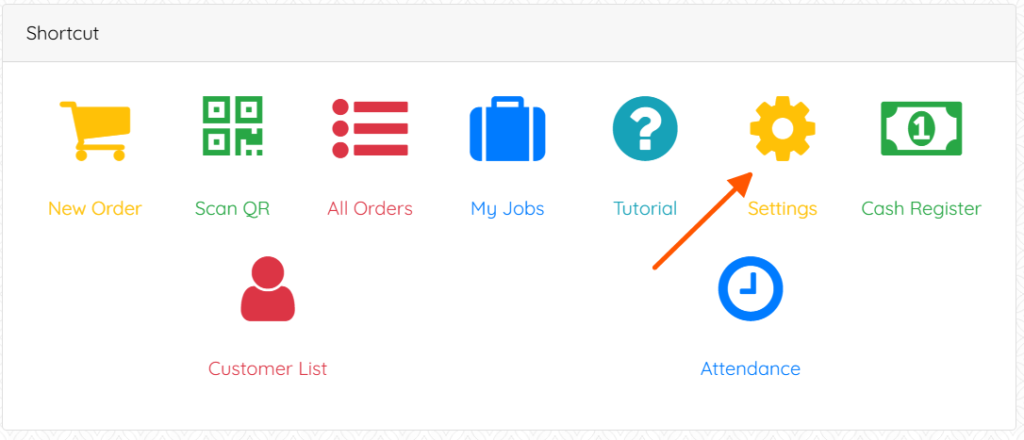
Login into your Works25 system, Go to Dashboard > Settings.

In the green Shop Front box, click on Integration.

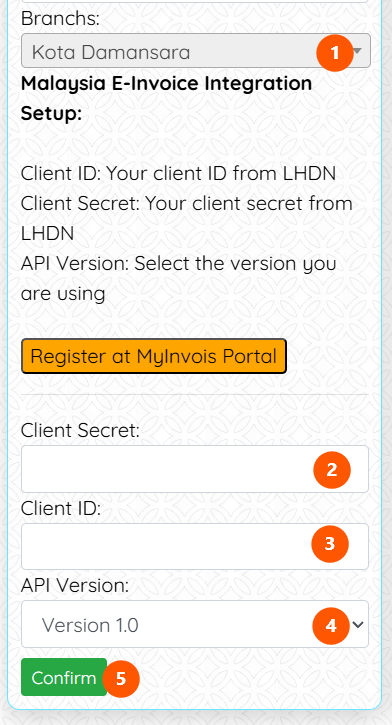
- Click Add An Integration
- Choose Malaysia E-Invoice Integration

- Choose the appropriate branch (If applicable).
- Fill in the Client Secret copied from MyInvois portal.
- Fill in the Client ID copied from MyInvois portal.
- API Version should be Version 1.0.
- Confirm.
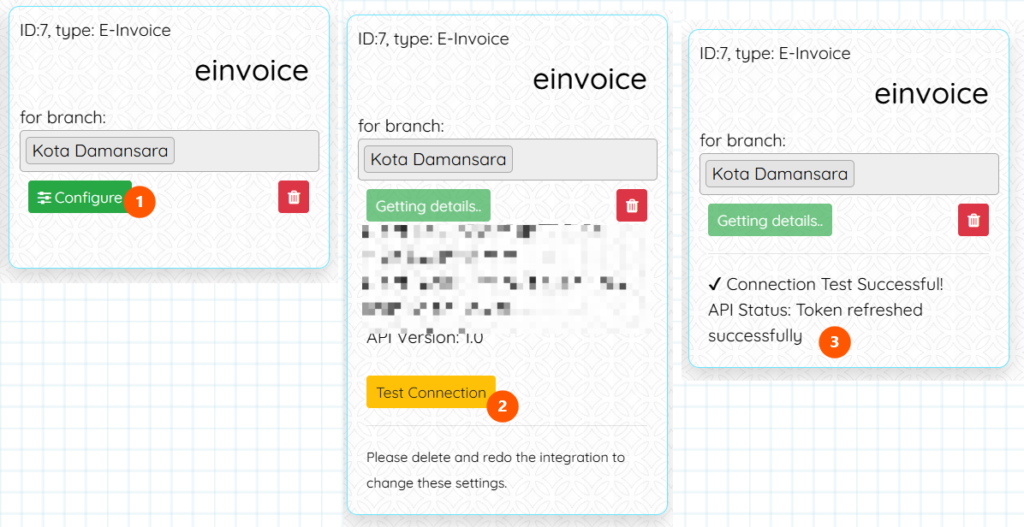
Now lets test the connection.
- Click Configure
- Click Test Connection
- Connection Test is successful.
Step 3: Setting Up your Company Details
Login into your Works25 system, and go to Dashboard > Settings.
Click on Company Information
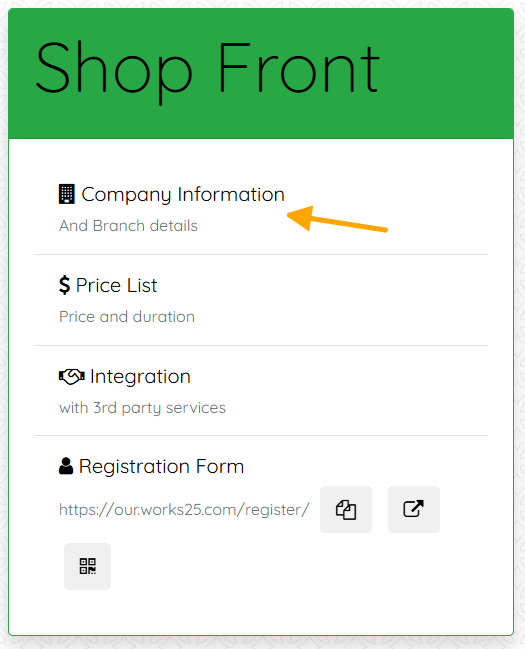
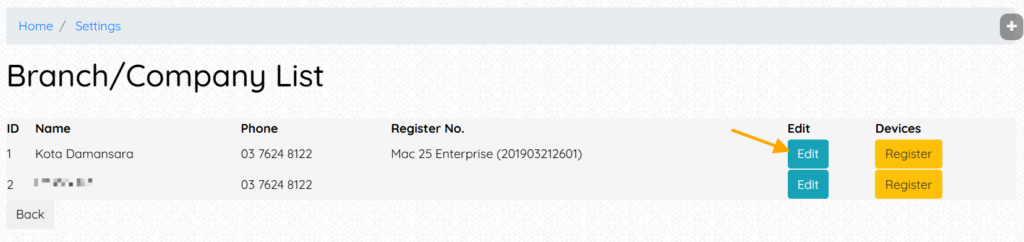
Click Edit.
Click on the blue button E-Invoicing
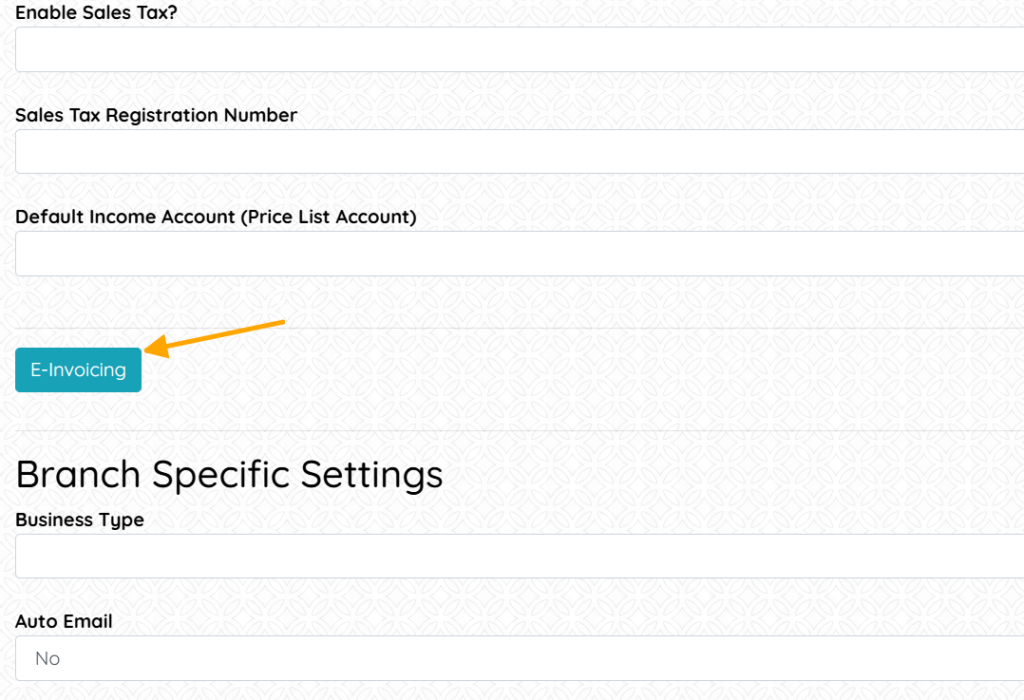
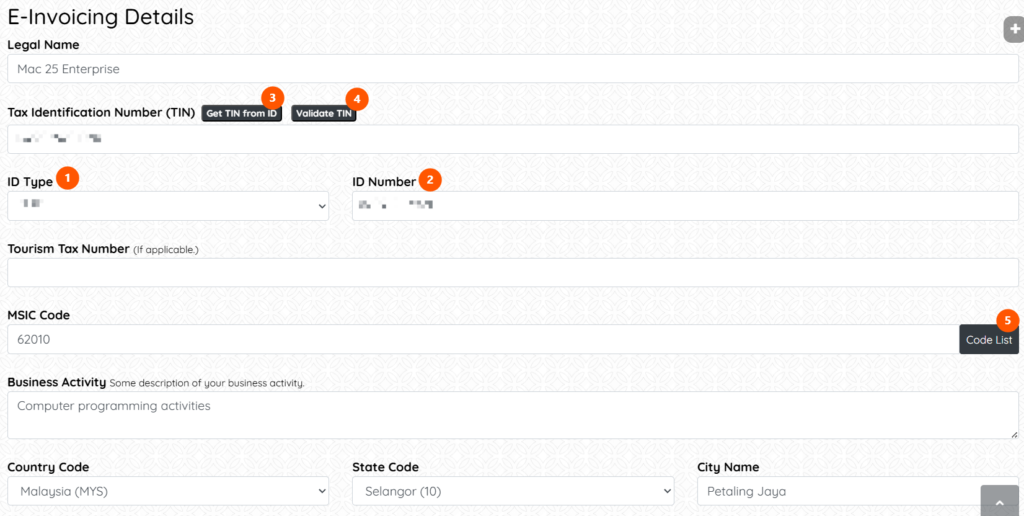
Fill in all the inputs. The tourism tax is optional. All others are required.
To get your TIN:
- Choose ID Type
For Sdn Bhd Company, choose BRN.
For Enterprise and Sole Prop, choose NRIC. - Fill in the ID Number (the NRIC or BRN Number)
- Click Get Tin from ID
- Click Validate TIN
Then, choose your MSIC Code. Click Code List to see all available codes.
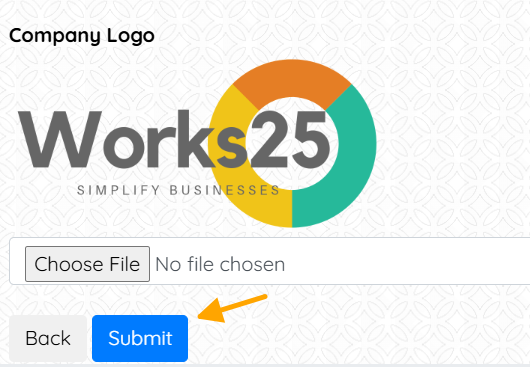
Then, scroll down, and click Submit.
Now your Works25 system is ready to send E-Invoice. Go to All Orders > Orders, and click on E-Invoice to start reporting E-Invoice.
Further guide on E-Invoice usage will be available soon
Update 2025-06-01: E-Invoice

Works25 Now Integrates with LHDN E-Invoice API
The long awaited integration is here! We will produce guides very soon.
Look forward to our first online seminar on E-Invoice:
Using E-Invoice Function In Works25
Tuesday, June 10 · 21:00 – 22:00
Time zone: Asia/Kuala_Lumpur
Google Meet joining info
Video call link: https://meet.google.com/wiy-hcvg-icw
Save the date!


ONLINE SEMINAR
Using E-Invoice Function In Works25
Tuesday, June 10 · 21:00 – 22:00
Time zone: Asia/Kuala_Lumpur
Google Meet joining info
Video call link: https://meet.google.com/wiy-hcvg-icw
Update 2025 Jan, Feb, March

Collection Note
If an order is still in Received status, Delivery Orders printed via the D.O. button will show title: Collection Note.

Receipt Date
For a paid order, the bill is printed as Receipt. The date shown will be the last payment date. If the original order date and the payment date differ, a separate line will print the Order Date.


Chit Button
A new button is available on the order summary page, labelled Chit. This is used to print out Chits for grouped by categories.


Re-Email Item Images
A new button is available on the image view popup, labelled with an email icon. Use it to re-email the image to the customer, if any email is provided.

Stations: Card View
In Orders > Stations, clicking on the gear icon will show some hidden settings, one of which is to use either tabular or card view for orders.
Choosing card view will enable color coding for Overdue, Late and On-Time orders. The color codes will be used to highlight orders, depending on its status and time threshold.

Customer Display: Custom Background Design
To complement the shop feel and theme, the customer display background can now be customised using an image as a background, or using pre-defined patterns.
Go to Settings > Device Settings to setup. Please note that this is only applicable to dual screen Windows PC POS unit.


New Customer Form Input: Tags & Introducer
Tags can be used to filter customers, and also introducer to award commission to the introducer.

Multi-branch Booking Form
Booking site visitor will be prompted to choose a branch, if the company has more than 1 branches using Works25 system.

Recurring Orders
Click Next after choosing items in New Order, then click a little white button Recur.
There will be some options to recur the current order.

Update 2024-12-09

Personal Theme
Users can now use a different theme, color-scheme and fonts instead of the default ones. To access this function:
- On PC and tablet: Click on your username on top of the screen
- On phone: Click on Menu, and click on your username
Then, click on the button called Theme. Choose a theme and a font from the list.

Light Theme and Caveat Font

Where to choose a different font.

Change Fonts for Mini-site and Bills
Go to Settings > General Settings > Mini-site to change fonts for main title, subtitle and text.
The chosen fonts will be used in mini-site, booking form and also bills.

Chosen applied on the mini-site.

Chosen applied on a customer bill.

Apply a wallpaper design.
To set a wallpaper design, go to Settings > General Settings > General > Admin Background. Edit.
Use the template button to help designing a wallpaper.

Default Order Status
There is a new option now, which is Received (Proforma Invoice).
Go to Settings > General Settings > Orders And Bills > Automatically Mark New Order As…
Choosing “Received (Proforma Invoice)” has the subsequent effects:
- New Orders which status is still Received and not fully paid, will be printed as Proforma Invoice.
- As Proforma Invoice, the order is not yet considered Sale or Revenue.
- Delivery Orders will be printed as Collection Note if the order status is still Received.
- Proforma Invoice title will change to Invoice once the order has been marked as Done or Delivered, and will only then be considered as Revenue.
Update 2024-10-14

Void Order
A dedicated button is now available, to void an order. An order can be voided if:
- The order is not yet checked out
- In this case, the system will abandon the order. No record of the order will be available.
- The order is in status: Received, and all item in the order is with status: blank.
- In this case, the system will cancel the sales, and mark the order as Void.
- The order will still be displayed in All Orders, with status: Void.

New Permission: Delete Profile
In Users > Permissions, new permission option is available under Profiles, which is Delete Profile.
This is a dedicated permission to enable profile deletion, in addition to Edit Profile permission.
Log Masuk Menggunakan Kod QR
Cara Cepat Ambil Gambar Item Pelanggan
Dengan menggunakan slideshow pointer, pengguna sistem Works25 boleh berterusan ambil gambar item-item pelanggan tanpa menekan skrin atau papan kekunci.
Slideshow Pointer yang digunakan perlu ada butang Next (atau Down), dan juga butang Back (atau Up).
Update 2024-09-01

Integration with CHIP Collect payment
The system now supports online payment gateway Chip. This is an alternative to Toyyibpay or Senangpay.
Click on this link to see the integration instructions: https://docs.google.com/document/d/1wEn2vaVRHL8zeltHg0jDzcWZ5OcrGb3dELMLUOCnecc/edit?usp=sharing

Tag On Price Menu Item
Tags can be associated with pricing item. This will help in further refining Vouchers and Promocodes to include only certain tags.

Points Shown on Printed Bills
Points now is displayed on printed bill by default. The information displayed includes the customer points now, points awarded by the bill, and points bought on the bill.
To hide the points on bills, go to
> Settings
> General Settings
> Orders & Bills
> Show Customer Points on Printed Bills
Change the setting to Hide.

Registered Customer Count by Item Category
A new group of reports is available, concerning on the number of registered customer by item category.
Go to Reports > Sales.
Below the table Registered Customer Count By Income Accounts, find a white button called Customer Count By Category.

Specify Max Resolution for Image Capture
Below the image capture preview, there is an option to change max resolution of the image. Choosing higher image resolution is better, but could take longer to upload.


Delay Image Capture & Remote Snap
On the same spot below the image capture preview, there is an timer option to delay the image capture, and also how many times to delay and re-capture a new image.
User can also plug-in a slideshow pointer with the PageUp & PageDown buttons to capture the image remotely.
The PageDown button ( > ) is programmed to snap an image or initiate timer.
The PageUp button ( > ) is programmed to change to a new image group, or to move to the next item.